After arriving at the mystical land overtaken by the evil Queen, Ravenlok will make sure you know the basic rules of combat, and at the same time will task you with reopening Hedgehog Etta’s shop for her and her brother Clyde.
While it’s a very early game quest, there are a lot of surprising twists and turns involved in finishing it off, with many items to return and a couple of bosses to put in their place. Get ready for a lot of back-and-forths, and be ready to steel yourself for some tough battles. Here’s how to defeat the foes that lie ahead and get that all-important shop open in this charming indie title.
Starting The Quest

You start Open The Shop by speaking with Hedgehog Etta, who will give you Mustard Seed Tea and tell you to bring it to Enid the Witch for a Blessing. The path to Enid the Witch’s house deep in the Mushroom Forest is currently blocked by Hedgehog Clyde, who wants you to grab him a Piece Of Fungus.

You earn this Fungus by finishing your combat training at the end of the Arm Yourself quest. Give the Piece of Fungus to Clyde and you can now go to the Mushroom Forest.
The Queen’s Ambush

Walk into the Mushroom Forest and find the glowing red orb. Interact with it and the evil Queen herself will appear in front of you. She’ll turn the mushrooms hostile, so prepare to defeat all of them, and then another wave of them just after. Once you’ve defeated the mushrooms, a door will open, and the following path will soon lead you to Enid the Witch.
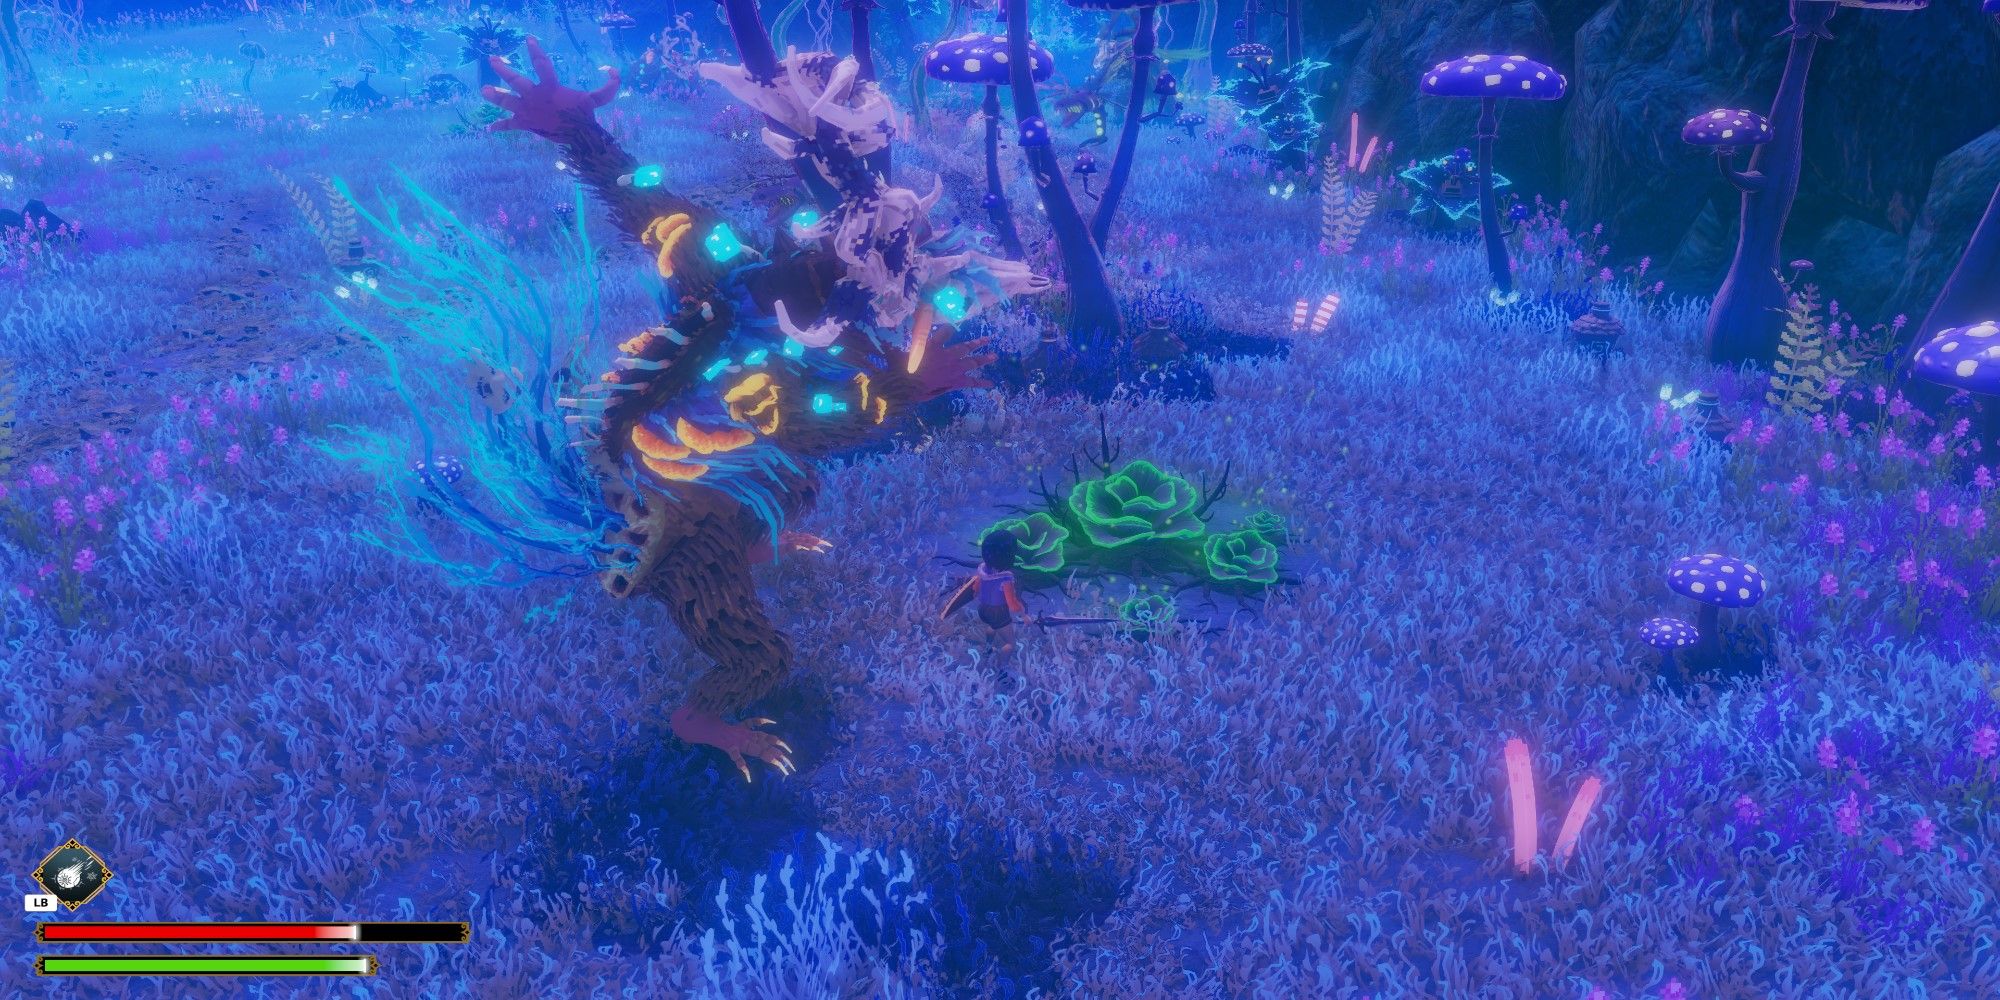
The Weeping Fungi

Enid will tell you that there are two more ingredients to collect before she can make the Blessing. The first is the head of the Weeping Fungi, a monster that’s been terrorizing the depths of the Mushroom Forest.

Before you go, take a quick note that you can level up here with the experience you gain from killing enemies. You will deal more damage the more you level up, as well as take more hits, so level as high as you can each time you pass by.

Take the path to the right and walk to the far end. You’ll have to deal with more Mushroom enemies. The enemy you’re looking for is this big green creature.

Green is the keyword, as it’s the Fungi’s favorite color, and he will only engage you in combat if you say “no” when he asks if you think it’s the best color too.

The Fungi has only a handful of moves, and they are mostly designed for ranged combat. He can spray the ground or the air, dropping green projectiles onto you. Your Shield can negate damage from these, but you can also just dodge them.
An up-front assault is recommended, as you can swing quickly to drain the Fungi’s health. Just worry about shielding and dashing during an attack, and swing at any opening. While the Fungi can be challenging at times, this is a simple fight as long as you stay alert.
Buvador The Bison

Return to Enid to find out you also need a piece of Buvador the Bison. She doesn’t tell you which part, but she does tell you he’s in Deer Lake. Killing the Fungi opened a path that will lead you to the lake.

Once there, head over to the opening in the trees to find the leader of the Stags.

The Stag Leader, Idris the Mighty, wants to trust you, but thinks you should prove that you’re worthy first. There are four other Stags in Deer Lake, and if you help all four of them, you can go and see Buvador. The requests vary a little, but aren’t very different to those the player will have encountered before.

Two of the Stags just want you to kill 10 of both enemy types for the area, the Mosquitos and Whisperers. If you were already killing these enemies before you activated these quests, the count will carry over.
Ten is also just high enough of a number that you’ll need to leave and reset the area, so try killing every enemy then speaking to the Stag Leader, or just leaving.
The other two Stags want something a bit more specific. You have to destroy four larvae and five allergen spores. All nine of these will be pictured below for you to try and follow, but remember you can’t destroy the spores until you start the quest, as the Stag will give you the quest item you need to do so.
The larvae locations

The first of the larvae is found in a bare patch in the grassy forest, surrounded by several enemies.

The second larvae is found in another patch, by a large, curved tree.

The third is found in this patch, near the edge of the forest.

The final larvae is also found near the forest’s edge, this time beneath two large, glowing flowers.
Allergen spore locations![Ravenlok Deer Lake Allergen Spore beneath large attacking enemy]()
The first allergen spore is found in this forest clearing (beware of the hostile locals).

For the second, enter this forest clearing, in the shade of the large tree.

The third allergen spore is in a central area protected by more imposing enemies.

The next spore is found in the shade of a large mushroom in this clearing.

The final spore is located near the third, in the clearing pictured here.
The battle with Buvador

With the proof you’ve helped all four Stags, talk to Idris the Mighty again. He’ll drop you into the pit Buvador is imprisoned in, and after attempting to tell you his side of the story, Buvador will misunderstand you and start the fight. It’s not the most difficult boss fight around, but players will need to stay alert regardless.
Buvador mostly charges at you, and a block will prevent damage but also drain all of your stamina. He may also drop green stalactites to trap you in place, but again you can just block. Wait for after a charge, then dash away and start attacking from behind. Use your special attack and bombs if you have any.
Speaking of special attacks, defeating Buvador will unlock one: you can now charge at enemies just like he did to you.
Making The Blessing

Enid asks you to do her work for her, so go inside the house and then use the ladder on the left. Find the cauldron and mix the ingredients. Your character will realize you need a source of fire. This means you’ll need to befriend Camy the Cauldron by doing his quest of finding four pieces of Cinder.
Cinder pieces locations

The first of the cinder pieces is found in the pit near the witch’s house.

The second cinder pit is located near the forest’s edge, by the stack of barrels.

For the next piece, visit the out-of-the-way stone formation pictured here.

The final piece is also a little hidden, behind these trees. With that, take the pieces back to Camy the Cauldron. Ask him for help afterward, and he’ll give you a Torch. Take the Torch back downstairs and make the Blessing.
Completing The Quest

Before you head back, speak to Enid, who will give you the Key to her Attic. Inside is a mirror you can use to fast-travel back to the Mansion, as long as you already unlocked that mirror as well.

Return the Blessing to Etta, and you finish the quest as well as unlock her shop. Your journey in this rather underrated indie gem can now begin proper.
Stay connected with us on social media platform for instant update click here to join our Twitter, & Facebook
We are now on Telegram. Click here to join our channel (@TechiUpdate) and stay updated with the latest Technology headlines.
For all the latest gaming News Click Here
For the latest news and updates, follow us on Google News.
Denial of responsibility! NewsAzi is an automatic aggregator around the global media. All the content are available free on Internet. We have just arranged it in one platform for educational purpose only. In each content, the hyperlink to the primary source is specified. All trademarks belong to their rightful owners, all materials to their authors. If you are the owner of the content and do not want us to publish your materials on our website, please contact us by email – [email protected]. The content will be deleted within 24 hours.