Inserting a lot of columns or rows in Microsoft Excel is awkward and prone to mistakes. When you need to enter dozens or more columns, use this VBA procedure for ease and accuracy.

Image: iStock/AndreyPopov
Inserting columns and rows in Microsoft Excel is a common task, and fortunately, it’s simple, as long as you’re not trying to enter too many columns (or rows) at the same time. Once your selection moves off screen, the selection process is awkward, and it’s easy to make mistakes. Try inserting 20 columns manually, and you’ll see what I mean. Now imagine inserting 100 or 500! If you need to do so even once, you’ll want to use the VBA procedure in this article instead!
SEE: 83 Excel tips every user should master (TechRepublic)
I’m using Microsoft 365 on a Windows 10 64-bit system, but you can use earlier versions. Use the downloadable .xlsx, .xls, or .cls files to obtain the code. Excel Online doesn’t support macros.
How to insert columns manually in Excel
Inserting a column or even a few columns is easy, and you’re probably familiar with the process already. If so, feel free to skip to the next section. Otherwise, let’s continue.
The process is simple: Select the column to the right of where you intend to insert a new column. Right-click the selection and choose Insert. If you select one column, Excel will insert one column. If you select three columns Excel will insert three columns. The same routine also works when inserting rows.
Now, let’s insert one column between columns C and D in any blank sheet as follows:
- Begin by selecting column D—the column to the right of where you want to insert the new column. To select an entire column, click the column header (the gray cell with the letter D).
- Right-click the selected column D.
- Choose Insert from the resulting submenu (Figure A).
- Figure B shows the new column. The orange column was D; now it’s column E. Nothing happens to column C. Notice also that Excel updates the column header cells appropriately.
Figure A
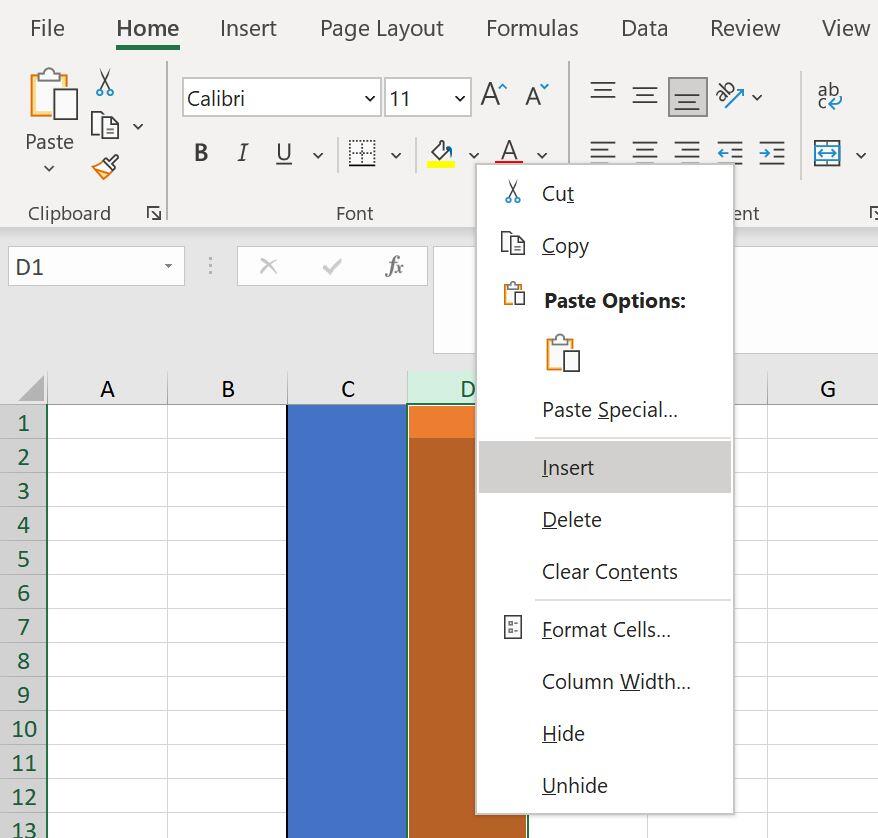
Figure B

The orange column is now column E.
If you change your mind, press Ctrl + Z to delete the column(s). You would never need a special procedure to enter a few new columns. But what if you need to insert 10, 15 or even 100 new columns? Selecting that many columns to the right would be awkward at best because you’ll be scrolling off screen to access them all. Keeping up with how many columns you select is difficult. Under these circumstances, you might want to use a VBA procedure instead.
How to use the VBA procedure to insert columns in Excel
The procedure in Listing A works with the selected cell and performs exactly as the manual process does. First, the macro defines a couple of integer variables, i and j: i stores an input value that identifies the number of columns to insert, and j is a counter. The next line uses the ActiveCell property to select the entire column, based on the cell the user clicks before running the procedure. The for-loop then uses the input value, i, to insert the appropriate number of columns to the left (xlToLeft) of the selected column. The procedure is versatile enough to also insert to the right of the selected column. Simply use xlToRight instead of xlToLeft (in the for loop).
Listing A
Sub InsertColumns()
‘Insert multiple columns. User enters the number of columns wanted.
Dim i As Integer
Dim j As Integer
ActiveCell.EntireColumn.Select
‘User inputs number of columns to insert.
i = InputBox(“Please enter the number of columns to insert”, “Insert Column(s)”)
‘Loop counts the number of columns to insert.
For j = 1 To i
Selection.Insert Shift:=xlToLeft ‘xlToRight
Next j
End Sub
If you’re using a ribbon version, be sure to save the workbook as a macro-enabled file or the procedure won’t run. If you’re using a menu version, you can skip this step.
To enter the procedure, press Alt + F11 to open the Visual Basic Editor. In the Project Explorer to the left, select ThisWorkbook so you can run the procedure in any sheet. You can enter the code manually or import the downloadable .cls file. In addition, the macro is in the downloadable .xlsx and .xls files. If you enter the code manually, don’t paste from this web page. Instead, copy the code into a text editor and then paste that code into the ThisWorkbook module. Doing so will remove any phantom web characters that might otherwise cause errors.
Now it’s time to use the procedure to insert a few columns. Before executing the macro, click a cell in the column to the right of where you want to insert the column. Let’s use the procedure to insert 10 columns between columns C and D:
- Click any cell in column D.
- Click the Developers tab.
- Click Macros in the Code group.
- In the resulting dialog, choose InsertColumns(), shown in Figure C and click Run.
- When prompted, enter 10 (Figure D), and then click OK.
Figure C
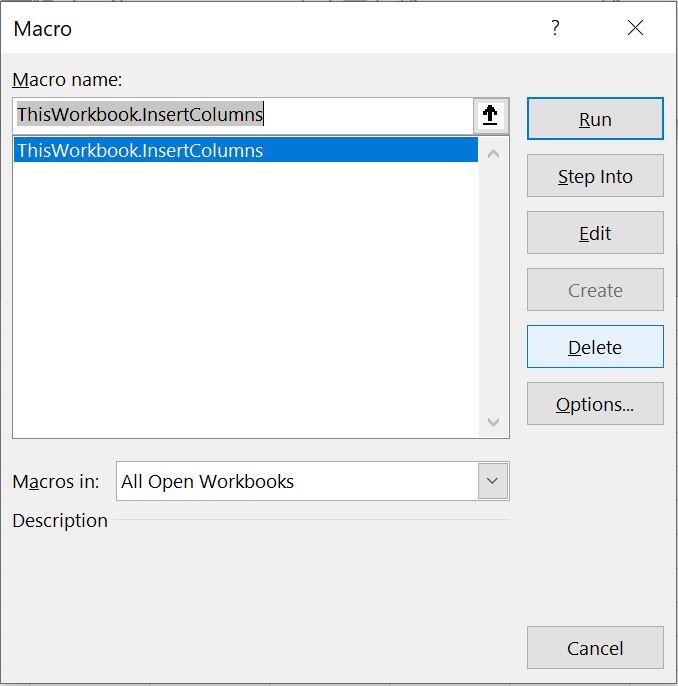
Figure D
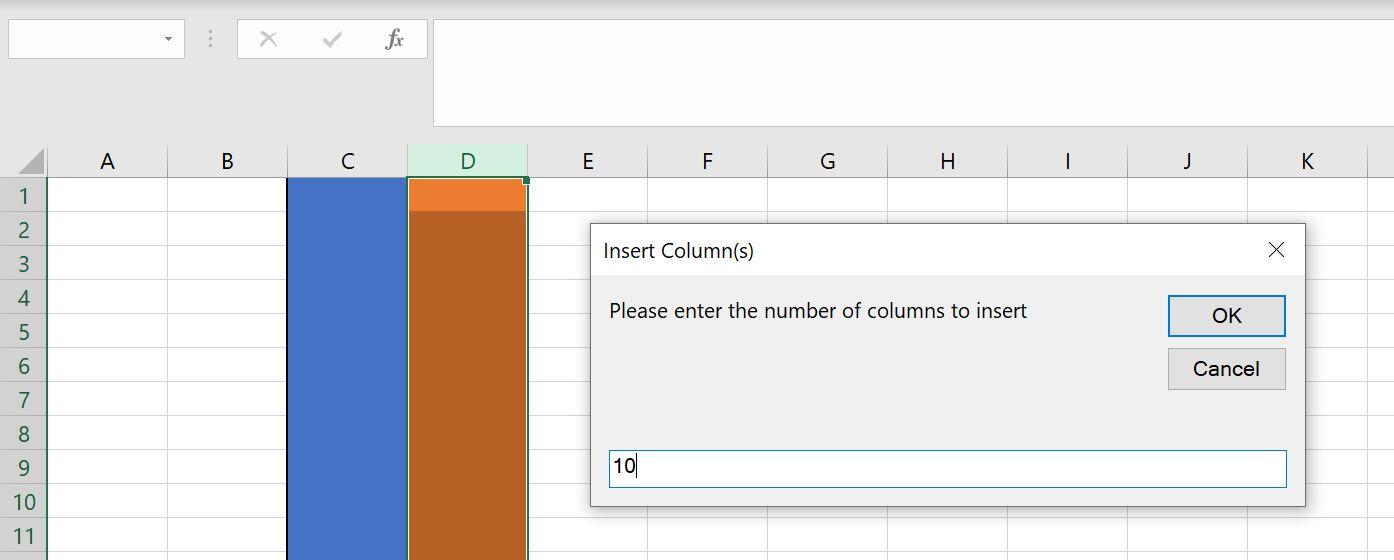
Enter the number of columns to insert.
As you can see in Figure E the procedure enters 10 columns between columns C and D. This doesn’t seem like a big deal right now because you could do this manually without too much effort, but imagine entering 20, 50 or more columns. This procedure saves you a lot of time and effort when you need to insert many columns. Unlike the manual process, you can’t undo the insert by pressing Ctrl + Z.
Figure E

The procedure inserted several new columns.
Bonus tip
This procedure offers no error handling. Right now, if a user enters anything other than a numeric digit, the procedure returns an error. The downloadable demonstration files have a second procedure that contains simple error handling. This file also contains a procedure for inserting multiple rows above or below the selected cell.
It’s unlikely that you’ll want to work through all those steps every time you want to run the procedure. Instead, add the macro to the Quick Access Toolbar. To do so, read How to add Office macros to the QAT toolbar for quick access.

Microsoft Weekly Newsletter
Be your company’s Microsoft insider by reading these Windows and Office tips, tricks, and cheat sheets.
Delivered Mondays and Wednesdays
Also see
Stay connected with us on social media platform for instant update click here to join our Twitter, & Facebook
We are now on Telegram. Click here to join our channel (@TechiUpdate) and stay updated with the latest Technology headlines.
For all the latest Technology News Click Here
For the latest news and updates, follow us on Google News.
Denial of responsibility! NewsAzi is an automatic aggregator around the global media. All the content are available free on Internet. We have just arranged it in one platform for educational purpose only. In each content, the hyperlink to the primary source is specified. All trademarks belong to their rightful owners, all materials to their authors. If you are the owner of the content and do not want us to publish your materials on our website, please contact us by email – [email protected]. The content will be deleted within 24 hours.