Windows creates a separate profile for each Wi-Fi network you’ve successfully logged into. Your Wi-Fi profile saves the network password so that if your Windows PC comes within range of this wireless network again, it can log on automatically without requiring you to enter the password again.
If you own several PCs or are switching from an old computer to a new one, it’s therefore helpful to transfer the Wi-Fi profiles saved by Windows. There are several ways to do this.
The manual way to transfer Wi-Fi passwords
First, use the right mouse button to click on a free space on the desktop and select “New -> Folder“.
Then give the folder a name of your choice, for example “Wifi_Backup“. Click on the folder with the right mouse button, go to “Show more options” and click on “Copy as path“.
Open the command prompt with administrator rights: Type cmd into the search field of the task bar and click on “Run as administrator” on the right side of the window. Now enter the command “netsh wlan export profile key=clear folder=”[path to backup folder]“.
Replace [path to the backup folder] with the previously copied path. For example, if you created the folder on the desktop as described, the full command is “netsh wlan export profile key=clear folder=”C:\Users[username]\Desktop\Wifi_ Backup“, where “[username]” is your username in Windows. Then press Enter. Windows will now create an XML file in the backup folder for each existing Wi-Fi profile. You can open these files with any browser. In the line that begins with “<keyMaterial>” you’ll also find the Wi-Fi password in each case.
Then copy the backup folder to the second computer using a USB stick or via digital sharing. Once that’s done, open a command prompt with administrator rights on the second PC. Now enter the command netsh wlan add profile filename=”[path to XML file]“ user=current and replace “[path to XML file]” with the path to the XML file that you want to transfer to the new PC.
The easiest way to do this is to right-click on the file as described above and then select “Copy as path”. The complete command looks like this: netsh wlan add profile filename=”C:\Users[username]\Desktop\WLAN_Backup\fritzbox.xml“ user=current.
Transfer Wi-Fi passwords to another PC with Windows account syncing

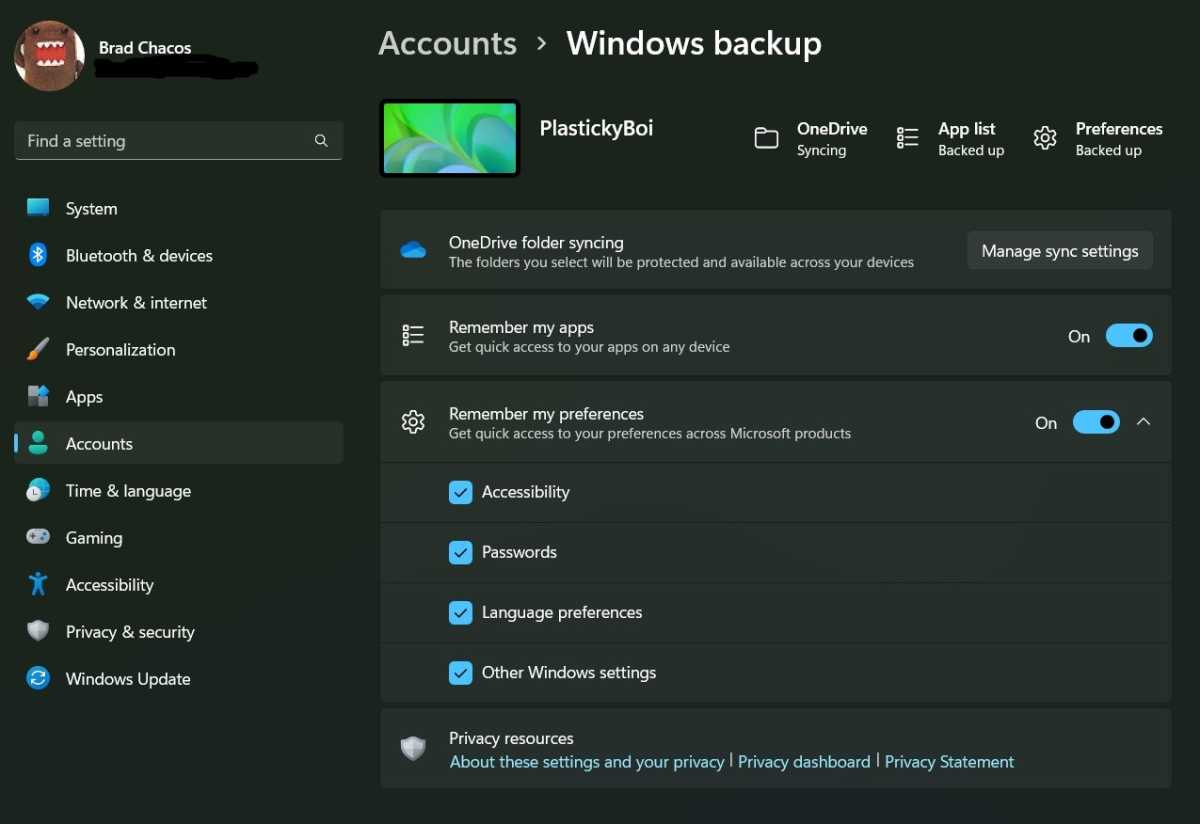
You can initiate a synchronization of your WLAN passwords with your Microsoft account in the “Settings” of Windows in the user accounts.
Brad Chacos/IDG
The big disadvantage of this method is that it requires a lot of typing and you can only transfer the Wi-Fi profiles to Windows one at a time. The second method, in which you synchronize the passwords via your Microsoft account, is much more convenient.
To do this, open the Windows “Settings” in the Start menu and go to “Accounts -> Windows Backup” (see the image above). Make sure that the switch for “Save my settings” is set to “On” and click on the downward pointing arrow next to it.
Check “Passwords” and “Other Windows settings” and repeat these settings on the second PC. Windows will then ensure that the same Wi-Fi profiles are available on both computers. However, the disadvantage with this method is that your passwords will be transferred to the Microsoft cloud and stored there. So if you’re concerned with security you may want to use an alternative method.
Transfer Wi-Fi passwords with NetSetMan

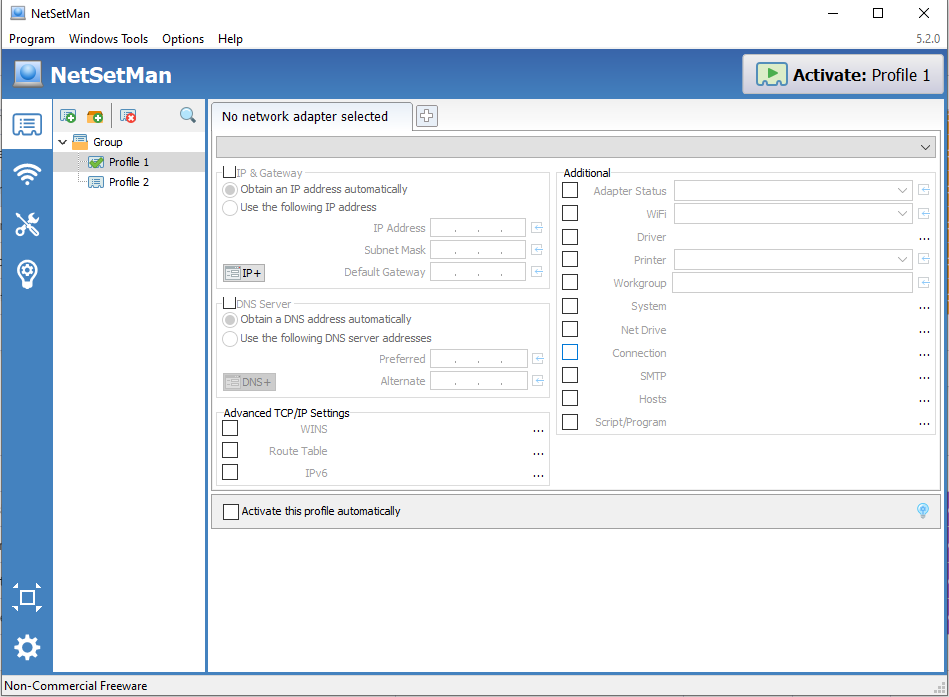
The freeware Netsetman offers the possibility to export the Wi-Fi passwords stored in Windows to a stick or another medium and thus copy them to another computer.
Roland Freist
Finally, you can also organize password syncing using a free tool. Netsetman can either be installed directly on Windows or started from a USB stick. Install and open the program and click on the Wi-Fi symbol on the left-hand side. Switch to the “Profiles” tab to get a list of the saved Wi-Fi profiles.
Next, select a Wi-Fi profile and click on “Export“. Determine whether the password should be saved encrypted or in plain text and select a folder. Netsetman saves the data there as an XML file. Repeat this process for all other Wi-Fi profiles you want and copy the folder to a USB stick or share it digitally.
Download the XML file(s) to the second computer and install Netsetman. Here, call up the list of Wi-Fi profiles and then click on “Import” to transfer the data from the stick to Windows and voilà! You now have all of your Wi-Fi profile passwords on your new computer.
This article was translated from German to English, and originally appeared on pcwelt.de.
Stay connected with us on social media platform for instant update click here to join our Twitter, & Facebook
We are now on Telegram. Click here to join our channel (@TechiUpdate) and stay updated with the latest Technology headlines.
For all the latest Technology News Click Here
For the latest news and updates, follow us on Google News.
